
Blowmold renewal
It's all about the stripping
Collecting and showing off blow molds is a passion many of us have. The thrill of finding an elusive piece is matched only when we can get it looking like it was brand new. How do you renew an old mold? Time, some chemicals and a lot of elbow grease yield great results. Trust me. I want your blow mold to look great so follow these easy instructions.
Supplies needed:
- Natural bristle or plastic scrub brush (caution: a wire brush can scratch the plastic)
- Old toothbrush
- Paper towels or clean cotton rags
- Large bucket
- Mild dish detergent
- Ammonia (use lemon scented, it’s easier on the nose)
- Paint stripper: 3M Safest Stripper, Klean-Strip Aerosol, Jasko (3M is the least caustic, move up to others as warranted)
- Paint brushes (2-3 different sizes will do)
- Mr. Clean Magic Erasers or generic equivalent
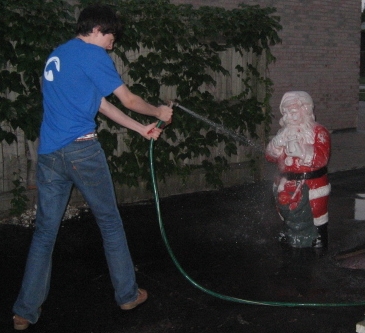
- Water and hose
- Painter’s plastic tarp (cheap)
- Rubber or latex gloves
- Eye protection (safety glasses)
To strip an entire blow mold it’s ever-so-tempting to start applying chemicals and assume all will work as planned. Been there, done that and ruined a few molds.
Where do you begin? Remove the light housing and any screws or light cord.

Mix a squirt or two of detergent in a large bucket of water. Hose down the blow mold and scrub the entire mold using your brush and the soapy water to remove surface dirt. Take the time to rinse the scrub brush of any old flaked paint that may get caught in the bristles.
Dip your scrub brush into the ammonia. Scrub down the entire blow mold and work to get any additional dirt, grease or loose paint off that may be in the creases of the mold. Rinse the mold down again. Use the old tooth brush, dipped in ammonia and scrub along each crease. Wash with detergent again and rinse the blow mold very well, paying particular attention to the creases you scrubbed. Dry the mold as thoroughly as possible and allow it to air dry. Often, a lot of the old paint will have been removed in this step.
I do not skip the cleaning step but others do. I have found that thorough cleaning and starting with a dry mold, prior to stripping, reduces the amount of stripper needed; thereby lowering the expense. Additionally, by allowing the mold to dry, the stripper used will not be diluted and will be more effective.
Stripping a mold is a messy process. Be aware that the stripper and paint turns into sludge that will run and drip. Before you start, place the mold on a cheap plastic painter’s tarp that can be rolled up and appropriately disposed of when the project is complete.
A word about strippers: There are many strippers on the market today. Several of them contain citrus oils, are non-toxic, biodegradable, and are environmentally friendly. These can typically be used without gloves, eye protection and are low in volatile organic compounds (VOCs). They present no inhalation or safety hazards. Those that contain dichloromethane, acetone, metholyne chloride, and other solvent compounds (acids) do pose an inhalation hazard, are eye irritants and can/will cause a chemical burn. Klean-Strip aerosol and Jasko, for instance, should be used outdoors or in a very well ventilated area; with appropriate steps taken to cover any exposed skin. A chemical burn hurts; do not disregard using gloves and eye protection. Read the container directions for all strippers before use, for safety precautions. Additionally, those strippers that contain acetone, those formulated for aircraft or require a neutralizer or mineral spirits for removal can damage the plastic of the blow mold. It is suggested that you use a stripper, such as 3M Safest, first, gauge your results and as needed, move to a stronger or more caustic stripper.
Pour the paint stripper into a container. Start brushing the paint stripper on, doing a small section of the mold to begin with. This will allow you to gauge the response of the stripper you are using.
Generally, doing the mold in quarters or smaller sections from the top down will provide excellent results. Strippers work at varying rates of speed and are influenced by the thickness and type of paint being removed. Take your time an do it right.
If using an aerosol, such as Klean-Strip, start spraying at the top of the mold and work down. The stripper will foam and start to run, taking the paint with it. If effective, you will see the paint in the sludge run-off.
Wait the recommended time as provided by the manufacturer. The chemicals in stripper cause paint to “swell”, which releases the paint bond from the substrate. Wait time is critical and cannot be rushed.
If you find that the process is going very slowly or the stripper is not working well you can apply more stripper, increase the wait time, or switch to a stronger formula. You will develop a “feel” for how much stripper to use. In general, when using a brush-on or spray, cover the mold in a thin coat or follow manufacturer’s directions to start. These strippers have been developed primarily for use on wood or metals so it’s important to watch how the stripper you are using reacts with your blow mold. Many will foam or bubble, others, such as 3M Safest, will not.
T
o check the effectiveness of the strip, use a paint brush and swirl it into the area that is being stripped. You should see the brush coming away with “colored” sludge, if so, the stripper is working, if not, you can allow more time, put on a thicker coat or move up to a stronger stripper.
Continue to strip the mold until all paint is removed. Hose the mold down and wash it thoroughly.
It is not unusual for paint to remain in the creases of the mold. Use a smaller size brush (I use one with an angle tip) to get the stripper into the creases of the mold, allow the strip to continue in these areas and use the tooth brush to remove the paint.
Thoroughly rinse the blow mold to stop the chemical process and to begin prep for painting. The blow mold should now be close to white. If it looks cloudy or has a tint, scrub the tinted areas with the Magic erasers and water. Using some kitchen cleanser (Comet, Ajax, etc.) also will work to remove the tint. Rinse again thoroughly. Make sure to remove all remnants of the stripper, the blow mold should literally squeak if you run a finger over the surface.
If you use the 3M Safest Stripper, pour the stripper into your container as above and brush it on. You do not need gloves to work with this stripper; it does not emit fumes and can be worked with indoors as well. Large areas of the blow mold can be done at once, if not the entire mold, depending upon the overall size. As you brush it on, work quickly. You want to avoid having the stripper dry out. Work the blow mold as instructed above, making sure to get the stripper into all the creases. Once you have covered the blow mold, wait at least 15 minutes. Using paper towels or rags, wipe the blow mold down, the stripper and the paint will come off. Rinse the mold. If there is still some paint on the mold, apply stripper to the areas you missed, wait another 15 minutes, and hose down again. Once the mold has been completely stripped, wash the mold down again with mild detergent and rinse thoroughly. Let the mold dry completely before you start your paint job.
If you do not have time to complete the entire strip in one session, wrap the mold in plastic. This will keep the stripper moist until you are ready to start working on it again. I have done this many times and have found that the strip is better, requiring less clean up or scrubbing.
Keep in mind that it is not unusual to have to strip a blow mold more than once to remove all the paint. Certain manufacturers, Poloron and Empire being good examples, used superior quality paint, which was heat set. The paint is often extremely difficult to remove and will usually require more than one strip–regardless of what type of stripper you use. Other manufacturers are very easy to strip. For instance, Drainage molds are so poorly painted that stripper is hardly even necessary. I point this out so that you will be aware that there are many factors that will affect your results on each mold that you do.
There are several reasons to strip away all of the old paint and remove tints:

If old paint is not completely removed, upon repainting, the amount of light coming from the interior of the blow mold will be reduced or will appear spotty. This is due to the increased thickness of the paint in those areas;
Adhesion of the new paint can be affected. Spraying on a new coat of paint over old deteriorated paint will affect the long term results of the new paint being applied.
If a heavy tint is allowed to remain, it can affect the color of the new coat of paint.
As in any restoration, the prep work you do now in respect to stripping the old paint, will pay you large dividends when you repaint your blow mold. The ideal is to bring the blow mold to as close to pure white as possible and to make sure it is squeaky clean. This will insure that your blow mold is ready to receive its new coat of paint, that the new paint will adhere, the light will shine through properly, and give you results that will last many years.
Stripper Resources
The products are listed in no particular order. Your results may differ from mine in respect to these recommendations. Results depend upon the initial condition of the blow mold and the amount and type of paint being removed. In that I have restored blow molds that were painted I have used and tested each of the following strippers.
3M Safest Stripper: sold as a semi-paste, brush-on. Available at Ace and True Value Hardware stores and online at Amazon.com. Non-toxic, non-caustic, biodegradable, water soluble, no fumes, no methylene chloride. Can be used indoors safely and washed down a sink. Effective on latex and oil based paints, varnish, lacquer, polyurethane, shellac, acrylics, epoxy, and enamels. Highly recommended.
Citris Strip: sold as a brush on gel and in an aerosol version. Available at Ace, Lowes, Home Depot and online. Effective on latex and oil based paints, varnish, lacquer, polyurethane, shellac, acrylics, epoxy and enamels. Non-caustic and can be used indoors. Highly recommended.
Hi-Speed Ready Strip: available at some Ace Hardware stores and at Amazon.com. Contains no methylene chloride, no caustic or harmful chemicals. Biodegradable. Removes most oil or water based paints, varnishes, latex, stains, enamels, lacquers, and polyurethanes. Results were mixed, worked well on one mold, did not on another.
Smart Strip: available as a brush-on or aerosol. Purchased online, as to retailers, I have no knowledge. Works on various types of paint. I found it to be slow. Does not contain methylene chloride, non-caustic, and biodegradable. Results were poor.
Klean-Strip KS3 Premium Stripper: available in semi-paste brush-on or aerosol. (A new version for stripping plastic has recently become available. I have not yet tried it, but will update its effectiveness after use) Klean-Strip is available at Home Depot, some Ace and True Value stores, Menards, some WalMart locations online. Klean-Strip is very effective. Must be used with gloves, eye protection and good ventilation. Recommended.
Jasco Premium Paint & Epoxy Remover: available as a brush-on or aerosol. Very effective. Caustic and does requires skin and eye protection, good ventilation. Removes various types of paint, varnish, lacquer, vinyl, shellac, epoxy, polyurethane and latex. Recommended.
Motsenbocker’s Lift Off Paint/ Varnish Remover: Not recommended, completely ineffective.
Strypeeze: this stripper is highly toxic, containing toluene, methanol, dichloromethane and acetone. It was greasy, irritated my nose and eyes and was hard to work with. Not recommended.
Heavy Duty Superstrip (Savogran): removes urethane, varnish, paint, epoxy, lacquer and marine finishes. This stripper must be removed with mineral spirits or TSP and water. Use with great caution.
Zinsser Paint and Finish Remover with Soyzol: removes latex and oil based paints, other coatings. 16oz spray bottle available at Menards, some Ace and TruValue hardware stores, Lowes, Home Depot and online. Recommended.
Zinsser Strip Fast Spray on Stripper: removes urethane, varnish, paint, epoxy, lacquer and marine finishes. Contains methylene chloride, methanol, and toluene. Although effective use with extreme caution, eye, skin and inhalation hazard.
This article was included in the Spring 2015 issue of PlanetChristmas Magazine.
By Carrie Sansing


