Cutouts the easy way
Tips and tricks learned the hard way
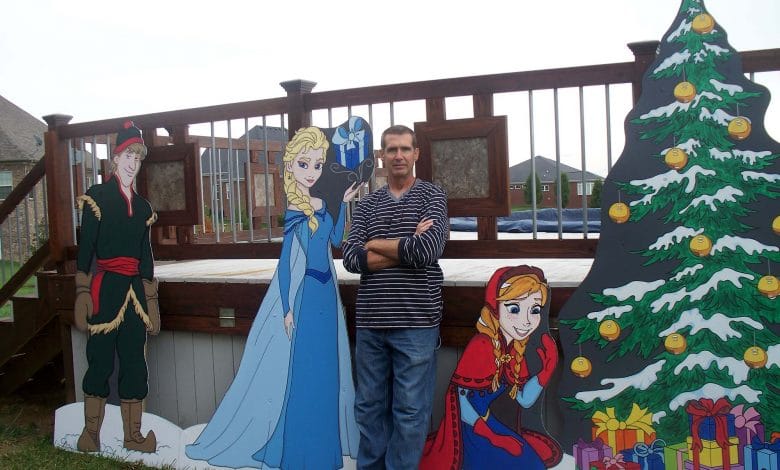
Ever wondered what goes into creating the wonderful Christmas decorations known as cutouts? Probably not, but you’re still reading… so I’ll go ahead and tell you. Imagination, time, materials and a small amount of talent.
You read that correctly. You don’t have to be a great artist to create eye catching cutout characters for your lawn’s Christmas display. Remember when you were a kid and loved using Crayons to create those beautifully colored pages? That’s all the artistic ability it takes to create a cutout. If you can color within the lines, you can probably create a cutout masterpiece!

What is a cutout? Well, if you’ve stayed with this article for this long, you either already know what a cutout is and can’t wait to find out how to create one… or you have no clue what I’m talking about and you’re trying to decide whether you want to continue reading about this unknown subject.
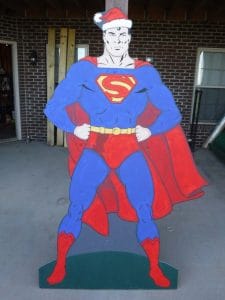
A cutout is simply a two-dimensional figurine that has been “cut out” of plywood, Coroplast, oriented strand board (OSB) or some other sheetgood product. Usually a cartoon type character has been painted on the front side and has some sort of frame attached to the back side. Obviously, once created, the cutouts are displayed on one’s property with the intended result of bringing smiles to the faces of those who view them.
Alrighty, now you know what a cutout is and items and skillset it takes to make one. Let’s go through the steps of creating a cutout. You’re about to find out how really it is for anyone and everyone.
For my example, I’m going to be making a cutout using Coroplast. Coroplast is a corrugated plastic that is like the cardboard box material. A lot of yard signs and political signs are made from Coroplast. Before the days of Coroplast, I used Masonite, or Hardboard, as it is sometimes called at the home centers. I have found that Coroplast is much more stable and much lighter in weight than using Masonite, oriented strand board (OSB) or plywood. The problem I incurred with any wood based product was warpage. Even though I would thoroughly cover the Masonite with sealant and/or paint, the Masonite would invariably soak up moisture and warp.
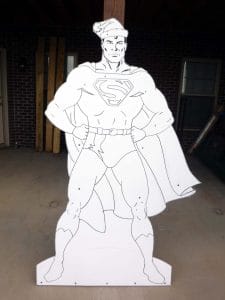
I found my local supplier of Coroplast by calling a local sign making company and asked them where they bought their Coroplast. I made sure to tell the person what I was going to do with the Coroplast so that he didn’t think I was going into competition with his shop.
The very first thing I do after getting the Coroplast home is to give the front side (side to be painted) a good cleaning with naphtha or paint thinner. This removes any of the oily residue left over from the manufacturing process. I skipped this process one time and paid the price. The paint bubbled up and peeled from the surface after one season.
The second step is take a paint roller and cover the entire surface with a good exterior white primer (I use a water based primer as well as paint). Why would you paint a white surface white you may be asking yourself? Well, another lesson learned the hard way.
I was painting a Santa character and decided not to paint the surface white. With a good amount of the Santa character being white (beard, hair, trim on his suit, etc.) why paint it white when the Coroplast was already white? As Paul Harvey used to say… and now, the rest of the story!
I had my second coat of red paint on Santa’s clothing and was applying the third coat when I got a little too much paint on my brush and dripped several drops of red paint onto Santa’s white beard. No problem… simply wipe it off… right? Well, unfortunately, red paint does not simply wipe off of white Coroplast. There were large pink spots all over Santa’s snowy white beard. Still no problem, I can use my white paint to cover the pink spots. Guess what? White paint does NOT match the white Coroplast in color. The pink spots were now white spots and looked just as bad. So I ended up spending a lot more time having to paint the white of his beard, eyebrows and fur lining on his suit to make everything match. I learned right then, use a roller to paint the whole board white with primer and you not only help the paint adhere to the surface, but you’ve got a white surface that you can easily touch up if necessary.
OK, back to the “how to”… now that you’ve got the sheet of Coroplast prepared, it’s time to draw out your character. Before I get into that, let me add my personal thoughts on picking out your characters.
I always try to tell a story with my groupings of characters (or vignettes). I don’t just throw similar characters together. Just because they’re all Disney characters doesn’t mean the characters tell a story or create a cohesive scene. Try to show why the characters are together. For instance, a couple of years ago, I wanted to use Disney characters in a scene. I didn’t want to just throw a bunch of Disney characters together, I wanted them to have a purpose of being together. So, I created a lamppost to be the centerpiece and all the characters were gathered around the lamppost singing Christmas carols. That’s one of my key ingredients in each scene I create… I have a centerpiece that draws all the characters together. It might be a Christmas tree they are gathered around or a clock or a lamppost.
OK… back to creating your characters.
I usually find my characters online or in Christmas coloring books that I find in bookstores or the dollar stores around Christmas time. If you just do a Google search for Santa coloring pages (elves, reindeer, etc.) you’ll find tons of images suitable for use. I find that coloring pages seem to translate easiest for me. The lines are drawn out and very distinct.
There are several ways to draw your characters on the painted Coroplast surface. The first way is if you have natural artistic ability and can simply draw it freehand. I know, not too many of us are talented enough to do that. Fortunately, I am… but I choose not to do it that way!
Method number two is to create a grid on both your image as well as your Coroplast. If you don’t know what I’m talking about, you can go to YouTube and find out how to draw using the grid method.
The final way, and the way I have chosen to do it, is with an old fashioned overhead projector. Yup, I cheat! It’s SO much faster than drawing everything by hand and a lot more accurate than either freehand or using the grid method.
You can, most likely, find on old overhead projector on Craigslist or at a garage sale for next to nothing. I’ve been using one for over 10 years now. I simply print out my character on printable transparency sheets. Once I’ve got my characters printed out, it’s just a matter of projecting the image onto the Coroplast and tracing.
Your character is now drawn (or traced) onto your Coroplast in pencil. After completing the pencil drawing, I always go ahead and go over my pencil lines with a black permanent marker. Pencil lines can smear and be easily covered during the painting process.
It’s time to cut out your character. I usually look closely at my character and decide if there are any areas that are too thin or flimsy to cut out and stand up to the brutal winds in my area. For example, I did a scene with the characters from Frozen last year. The reindeer, Sven, had his antlers sticking up and they narrowed down to thin points in quite a few places. Where I live, the wind is wicked, up to 60 mph. Small, unsupported areas are going to fold over rather quickly in the wind. So, I drew a larger area around the antlers in a nice curve and cut out the entire area. A coat of dark gray paint in the background worked nicely to hide that extra area and made the antlers stand out a bit more.
To cut out the shape, I use a jigsaw with a fine, metal cutting blade. I have found that the fine teeth on the metal cutting blade leaves the fewest burrs on the material. (Any remaining burrs can be removed with sandpaper or a sharp razor blade and a steady hand.)
It works best if you can set your sheet of Coroplast up on some risers of some sort. I used to set 2×4’s on edge and support underneath the Coroplast as much as possible. Last year I discovered my table saw and outfeed table are great for cutting. I spread the two apart by about a foot and use that open area to cut. The Coroplast easily slides on the surface and it saves my back not having to crouch down for long periods of time.
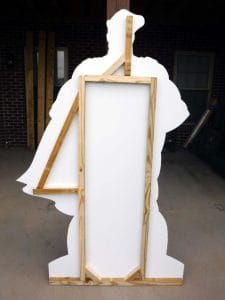
After cutting out your character you’ll want to go ahead a build the frame for the backside of the character. In the past, I have used 2 x 2 pressure treated lumber to build my frames. The cost of 2 x 2’s has sky-rocketed, so this year I purchased 2 x 6’s and used my table saw to cut the lumber down into three 2 x 2’s. The frame will give the Coroplast more rigidity as well as give you something to attach your ground stakes to.
No two characters are the same, so the instructions for building the frame will be very generic. I always have one board across the entire length at the bottom of the character and then I build from there. I try to create squares or rectangles that are located as close to the edge as possible without being seen from the front.
I normally use butt joints, but that’s because I have a Kreg jig that allows me to create nice strong butt joints. I also use small corner braces to add strength. You can miter your joints if you want… but you can get a decent joint simply using a butt joint. You’ll want to pre-drill your holes so that you don’t split the lumber.
Once you’ve created your frame, you’ll position it on the back side of the figure and attach it, from the front side, using some exterior screws and washers. The washer will keep the screw head from simply tearing right through the Coroplast.
Your character is drawn, cut out and attached to the frame. Now comes the fun part! You get to paint the character and bring it to life.
I went to my local paint store and bought about six or seven quarts of a good quality exterior flat latex paint in different colors. Purchase primary colors and possibly a flesh color, black and brown. With those colors in hand, you can mix pretty much any other colors you’ll need. Start saving your plastic peanut butter jars to mix paint and create new colors!
If you were paying attention, I had the word “flat” in capital letters in the paragraph above. There’s a reason for that! Another lesson learned the hard way.
I created my first cutout over 25 years ago. I had it drawn, cut out and mounted to the frame. I took my time painting it with a very nice high gloss exterior paint. I was so excited to see how it looked the night I finished painting it. I took it outside and hooked up one of my spotlights to see how grand it was going to look in my front yard. I turned on the spotlight and the entire six foot five-inch-tall Santa was wiped out in nothing but a white glow. I couldn’t see anything because the reflection of the light off the high gloss paint was so bright. I had to go back to the paint store the next day, buy all new flat paint and repaint the entire piece.
Painting isn’t that difficult, but it can be monotonous though. Some of your paints, like red, might take you two or three coats to get good coverage. Take your time and stay within the lines. It’s not that difficult to stay inside your lines.
Once you’ve applied your paint, you’ll want to take your permanent marker and go over all your black outline markings again.
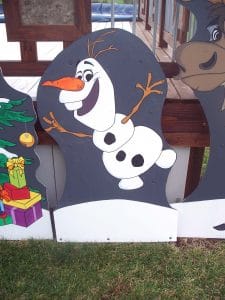
The last painting tip I can give you is to do a little bit of shading on your characters. Really, it’s not that difficult to do. I take a brown paint and thin it down with water and some black paint and thin it down with water. The brown I use for skin areas and the black is used on everything else. Just look at your character and think of where there would be natural shadows and shading on it. Adding some shading to your characters adds a richness and a depth to your characters that most people find appealing but they don’t realize that it’s done through shading.
To stake my characters to the ground, I make my stakes out of 1/2” x 2” pressure treated strips and cut them to appropriate length for each piece. I allow for at least a foot of material to go into the ground and then determine how long the piece needs to protrude out of the ground to support the character. Once I’ve cut it to the appropriate length, I cut one end to a sharpened point for driving into the ground and tape the other end with electrical tape. The tape helps to prevent the wood from splintering apart as you drive it into the ground.
Place your first stake to line up with one of your upright frame pieces and drive it into the ground. Measure over and place your second stake so that it will line up with your other frame upright and pound it into the ground. Put your character in place, pre-drill your holes and screw through the stake into the 2 x 2 upright.
Once you’ve gotten all your characters staked into the ground, you’re ready to light ‘em up and enjoy the smiles on the faces of all those coming to view your cutout Christmas display!
And that, dear reader, is how to create a cutout! Now that you know how, enjoy the process and make sure you post pictures on the PC forum!
Who is John Bryant? John Bryant was born and reared in Lexington, KY. His enthusiasm for creating cut-outs was cultivated at a very early age. John’s father, Paul, was creating yard displays back in the early 60’s. At that time there weren’t many people doing any type of yard decorations other than lights and wreaths. The uniqueness of having a full yard display drew a line of cars that stretched down the street with people waiting to see his display. John started creating his own yard displays 25 years ago and has displayed cut-outs in his yard each and every years since he began. Something new and different is incorporated into his display each year.
This article was included in the November 2016 issue of PlanetChristmas Magazine.
By John Bryant

